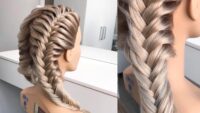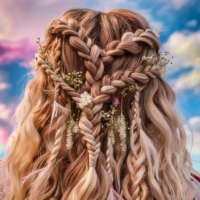
What Are BohoBraids?
Boho braids, short for “bohemian braids,” are a trendy and versatile hairstyle characterized by loose, textured braids that exude a carefree and bohemian vibe. These braids often incorporate elements of nature, such as flowers, feathers, or beads, to enhance their boho aesthetic. Boho braids can take various forms, including fishtail braids, Dutch braids, or simple braided styles adorned with accessories like ribbons or scarves. They are popular for casual outings, music festivals, and other relaxed occasions, adding a touch of whimsy and charm to any look.
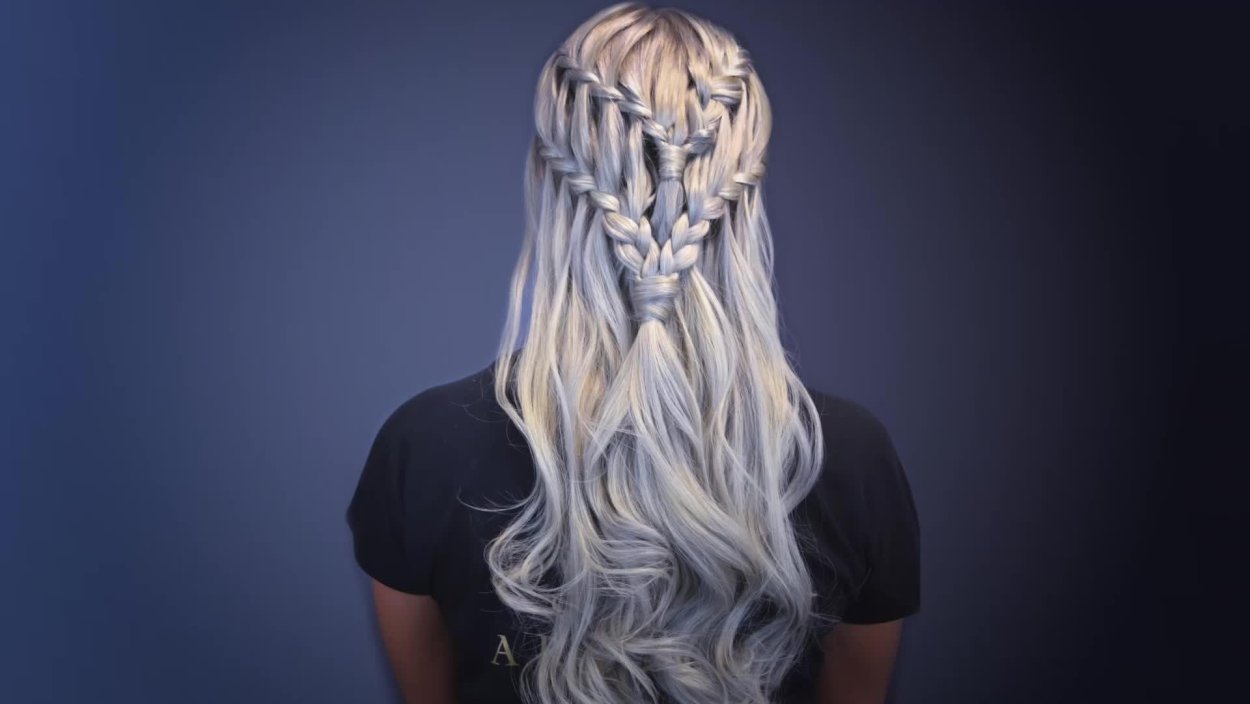
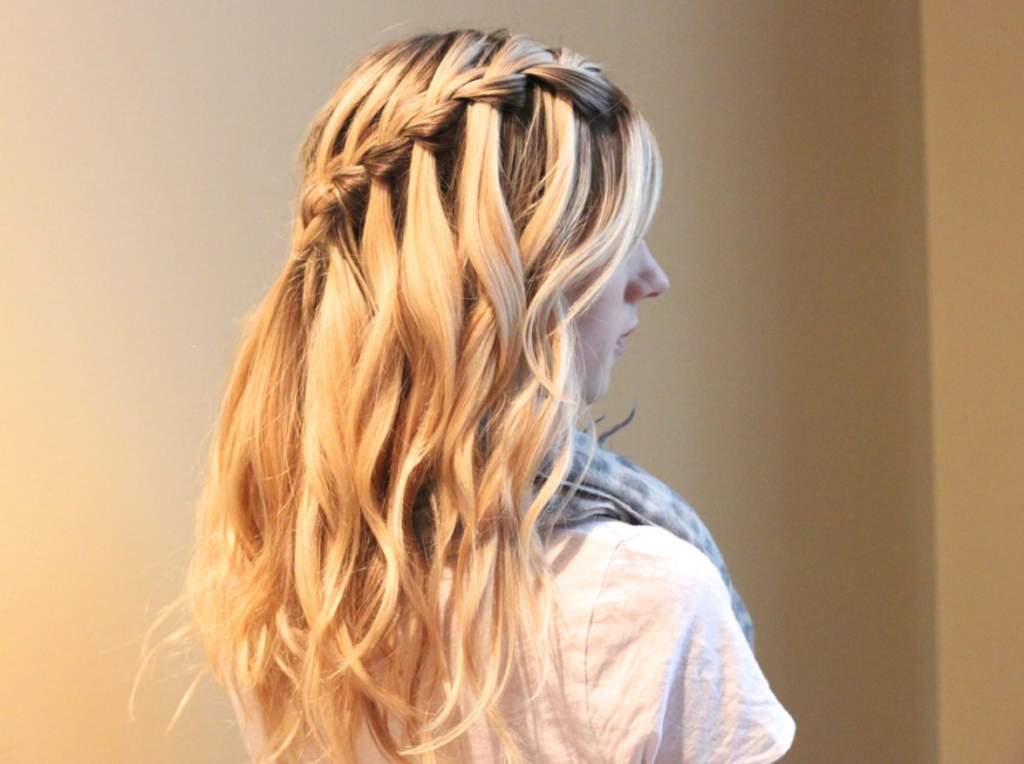
To create a waterfall braid, you’ll need to follow these detailed steps:
1. Prepare Your Hair:
Start with clean, dry hair. You can brush or comb your hair to remove any knots or tangles. For added texture and grip, you can also apply some styling mousse or texturing spray.
2. Part Your Hair:
Decide where you want your braid to start and create a deep side part or a center part, depending on your preference. Use a comb to create a clean parting line.
3. Begin Braiding:
Start by taking a small section of hair near the parting line. Divide this section into three equal strands, just like you would for a regular braid.
4. Start Braiding:
Cross the right strand over the middle strand, then cross the left strand over the middle strand. This completes the first stitch of your braid.
5. Drop the Strands:
Here’s where the waterfall effect begins. After completing the first stitch, drop the right strand (the one closest to your face) and let it hang down loosely.
6. Add New Hair:
With the dropped strand, pick up a small section of new hair from above the braid. This new section should be similar in size to the dropped strand.
7. Continue Braiding:
Cross the picked-up section over the middle strand, just like you did with the previous stitch. Then, cross the left strand over the new middle strand.
8. Repeat the Process:
Now, drop the left strand (the one farthest from your face) and let it hang down. Again, pick up a new section of hair from above the braid and incorporate it into the braid.
9. Keep Braiding:
Continue this pattern of dropping a strand, picking up new hair, and braiding until you reach the desired point along your head. You can choose to braid diagonally across your head, horizontally along your hairline, or any other direction you prefer.
10. Secure the Braid:
Once you’ve braided to your desired point, secure the braid with a small hair elastic or bobby pin. You can also continue the braid all the way down and secure it with a larger hair tie for a more intricate look.
11. Final Touches:
To enhance the waterfall effect, gently tug on the edges of the braid to loosen it slightly. This will create a softer, cascading appearance.
Optional:
Finish with hairspray or hair serum to tame any flyaways and add shine to your braid.
With practice, you’ll master the art of creating beautiful waterfall braids that add an elegant touch to any hairstyle. Enjoy experimenting with different variations and incorporating this stunning braid into your everyday or special occasion looks!